Showing posts with label hair tutorial. Show all posts

Thursday, January 9, 2014

Unicorn Braided Bun

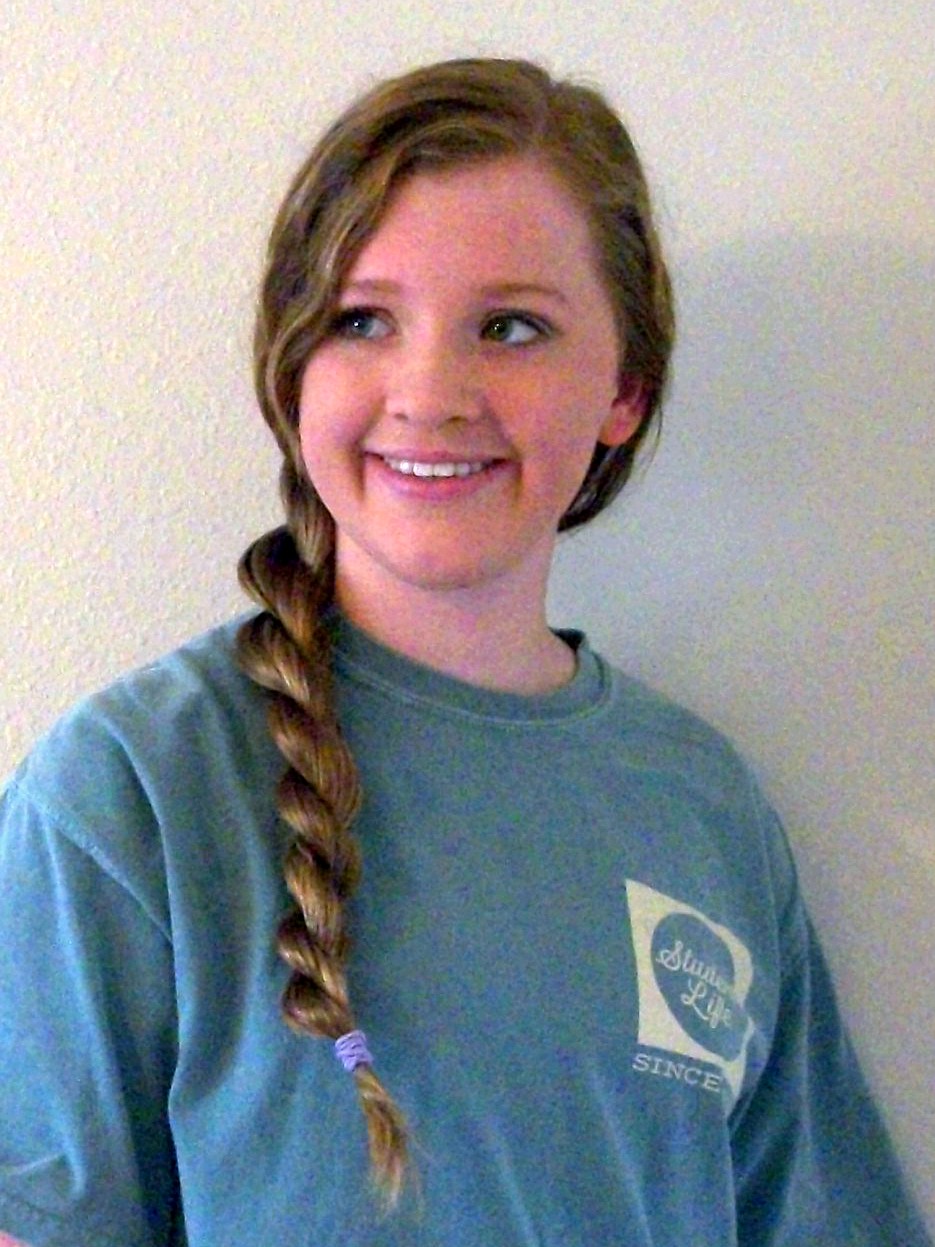
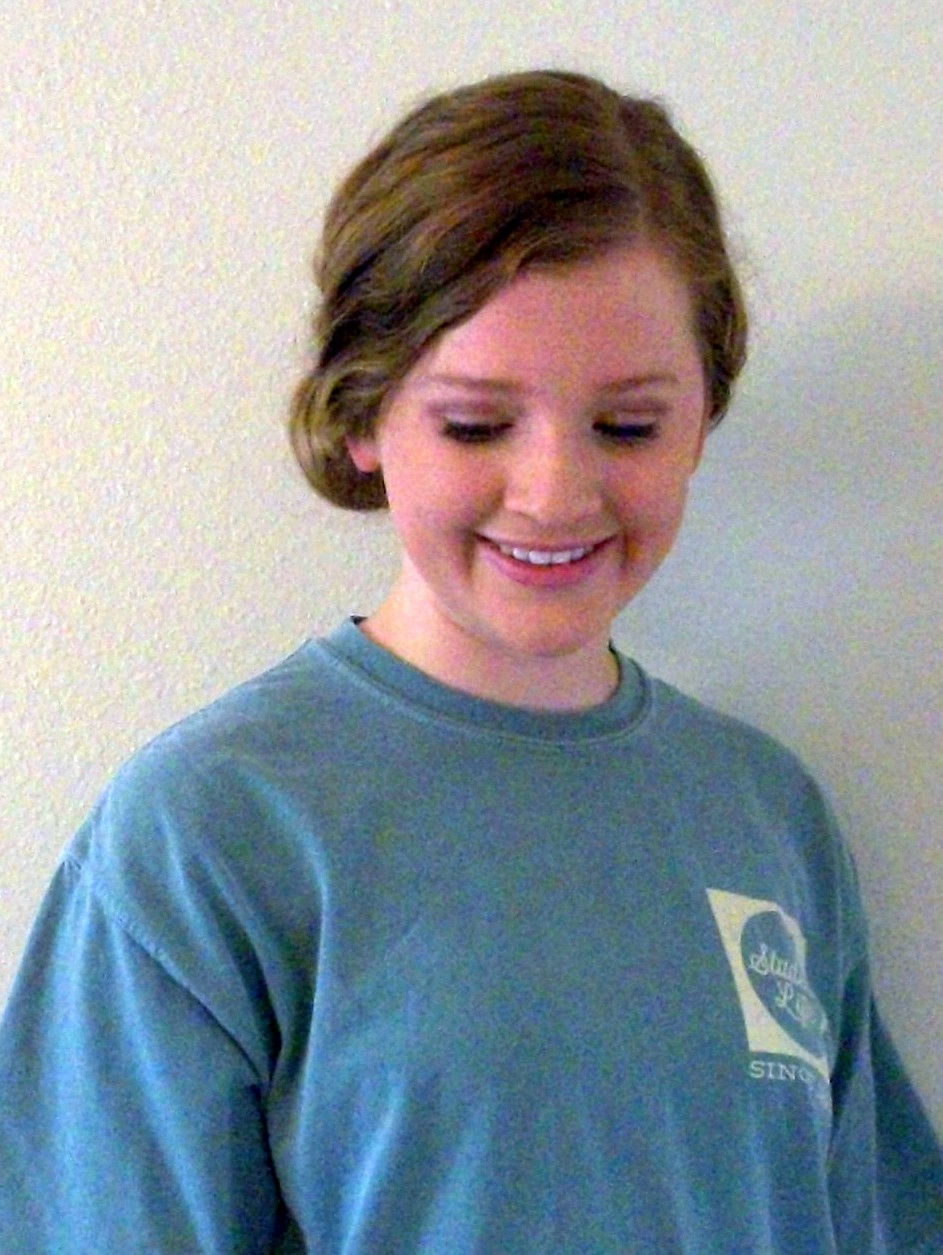
One of the new hairstyles I've tried lately is the unicorn braided bun. After I did my post on the unicorn braid, I just twisted up the braid and made the bun. That pretty much sums up how I made the look, but here are the pictures of the process.
First, start of with a unicorn braid with a thin or clear elastic holding the hairstyle in place.
Secondly, wrap/twist the braid around itself on the back of your head where you want your bun to be placed and secure the look with bobby pins or small clips. I put my bun to the side to make it more dramatic and noticeable.
Here's the finished look. You can put decorative bobby pins in or clips to make the bun really stand out or to dress it up.
Here's the finished look. It is so cute, chic and easy to do!
I think the look turns out wonderful and is something everyone should at least try out. Hope you enjoy this look. It's a great 5 minute look!

                                                        photo Sig_zps6fb098ce.jpg      

Tuesday, October 22, 2013

Bohemian Wrap (No Heat Curls)

This is one of my favorite hipster hairdos. It's so cute and it is also a way to curl your hair without using heat. I've been doing my hair like this for about two years now and I absolutely love it! It makes super cute curls and all you have to do is sleep or just go about your day. So, here's how I do the bohemian wrap.

Materials Needed
  1. Headband (1-2in long)
  2. Bobby pins
  3. Hair spray
1. Have dry or slightly damp hair. (For no heat curls you need to have slightly damp hair that has been brushed).
2. Grab a headband that is about 2-3 inches wide. (The bigger the headband the bigger the curl).
3. Place the headband over your hair, right about your ears and push/pull up your hair on the top to add volume.
4. Grab an inch of hair on the left side of your hair and pull it behind the headband. Then grab another inch of hair and added to the inch of hair you just pulled behind your headband and repeat the process until you have reached behind your ear. (the tighter you pull your hair, the tighter the curl will be).
(It should look like this after 2-3 strands of hair have been combined.
5. Then repeat the same process on the other side of your hair and stop behind your ear.
6. Then after completing both sides place all of your hair on both sides together and wrap the whole section of hair behind the headband and pull tightly. (I've noticed that since my  hair has gotten longer it's harder to do this part unless and do the left and the right section of hair 2-3 more twists past my ear and then combining the two sections).
7. Then, when you have reached the end of your hair, tuck the leftover hairs behind the headband. (You may need 1-2 bobby pins to secure the last few hairs).
8. And, your finished! You can put hair spray in your hair if you want to hold down fly away hairs or make it messier and pull different pieces out. *If your trying to get the no heat curls, just sleep on your wet hair and in the morning take out the headband and you will have the curls. The curls are amazing and with a touch of hair spray you should be ready to go out.
This is one of my favorite looks and I would love to hear your thoughts on the hair style.
It's a fresh, cute and new style that I haven't seen any one else wear, and I receive tons of compliments every time I wear my hair this way.

 photo Sig_zps6fb098ce.jpg

Monday, October 7, 2013

Ponytail Unicorn Braided Bun

I am all about cute creative buns and this is one of those hairstyles. I've never seen any one wearing a bun like this and they are so easy to make and the style to me looks like it takes a lot of time and effort to get it but in reality it only take 2 minutes!

I believe that every braid, or twist can be made into a cute bun and I love trying out cute hairstyles. Usually I stand in front of my mirror, and just mess with my hair and figure out what hairstyles I can come up with and this is one that I thought was super cute.

Here's how you make it.

Materials Needed
  1. Hairbrush
  2. Hair ties
  3. Bobby Pin/ hair clips
  4. Hair spray
This look can be done on any hair type, especially curly hair.
1. Braid your hair into a unicorn braid. You can find my hair tutorial here
2. Next just grab your braid and wrap it around itself until it resembles the messy bun you want. I like to wear my buns big, so I usually wrap the braid really loose around itself and then pin it in place with bobby pins.
3. And there you have a cute new messy bun!

I hope you give this look a try. It is so cute and perfect for fall!

 photo Sig_zps6fb098ce.jpg

Monday, September 30, 2013

How to Unicorn Braid

I've seen a ton of cute braids lately, but one that I really like is the unicorn braid. It's really different from other braids and looks so cute. Here's how you do a unicorn braid.

1. Place your hair on one side of your face and part it down the middle.
2. Then twist the strands and just act like your doing a braid and just keep placing one section of hair behind the other. Basically your just twisting a section of hair behind the other section of hair and so on.
3. Then when you reach the end use a hair tie and some hair spray and your finished!

I hope you give this look a try! It is perfect for a day when you just what to leaver your hair alone but don't want to leave it down.

 photo Sig_zps6fb098ce.jpg

Tuesday, September 17, 2013

Tribal Print


   Top: Target
Shorts: Old Navy
Shoes: Cato
Belt: Gift

I wish I could say it's cool in Texas, but it is blazing hot and doesn't even feel like fall. I'm praying that it gets cool soon. As much as I love shorts and cute tanks and v-necks, I'm ready for the fall, cool weather.
 
I love to wear orange, gold and brown centered outfits and due to my basically 5 month summer I'm a little tired of wearing super bright colors and I'm not enjoy the fact that when I walk outside I'm immediately sweating. I'm sorry if I come off like I'm rude or hate summer, but since I live in the hottest part of Texas, I feel as if I have rights to be a little ticked that it's still hot.
 
Well, I hope your weather is cooled down. Please pray that Texas weather goes down a couple degrees this week.

 photo Sig_zps6fb098ce.jpg

Monday, September 16, 2013

Ponytail Braid Tutorial

One of my new favorite hair does for when I'm on the go and don't want my hair in my face is the ponytail braid. It's essentially a braided side ponytail and is perfect to wear when you're working out or doing errands and don't want to fix your hair.

I hope you give this tutorial a try!

Materials Needed
  • 2 hair ties
  • Hair brush
  • Hair spray
1. Start with clean, dry hair.
2. Put it in a side low ponytail.
3. Next split your hair into three equal sections and start braiding. Here's a link on how to do a messy braid
4. Next finish braiding and secure the braid with a hair tie.
5. Then loosen up the braid and your done.
I hope you enjoyed this tutorial and that you try it out. I like it because it gives your braid that extra hold which is perfect for people who run or play sports or just want to have a secure braid.


 photo Sig_zps6fb098ce.jpg
Related Posts Plugin for WordPress, Blogger...
//