Showing posts with label diy. Show all posts

Thursday, January 9, 2014

Unicorn Braided Bun

One of the new hairstyles I've tried lately is the unicorn braided bun. After I did my post on the unicorn braid, I just twisted up the braid and made the bun. That pretty much sums up how I made the look, but here are the pictures of the process.
First, start of with a unicorn braid with a thin or clear elastic holding the hairstyle in place.
Secondly, wrap/twist the braid around itself on the back of your head where you want your bun to be placed and secure the look with bobby pins or small clips. I put my bun to the side to make it more dramatic and noticeable.
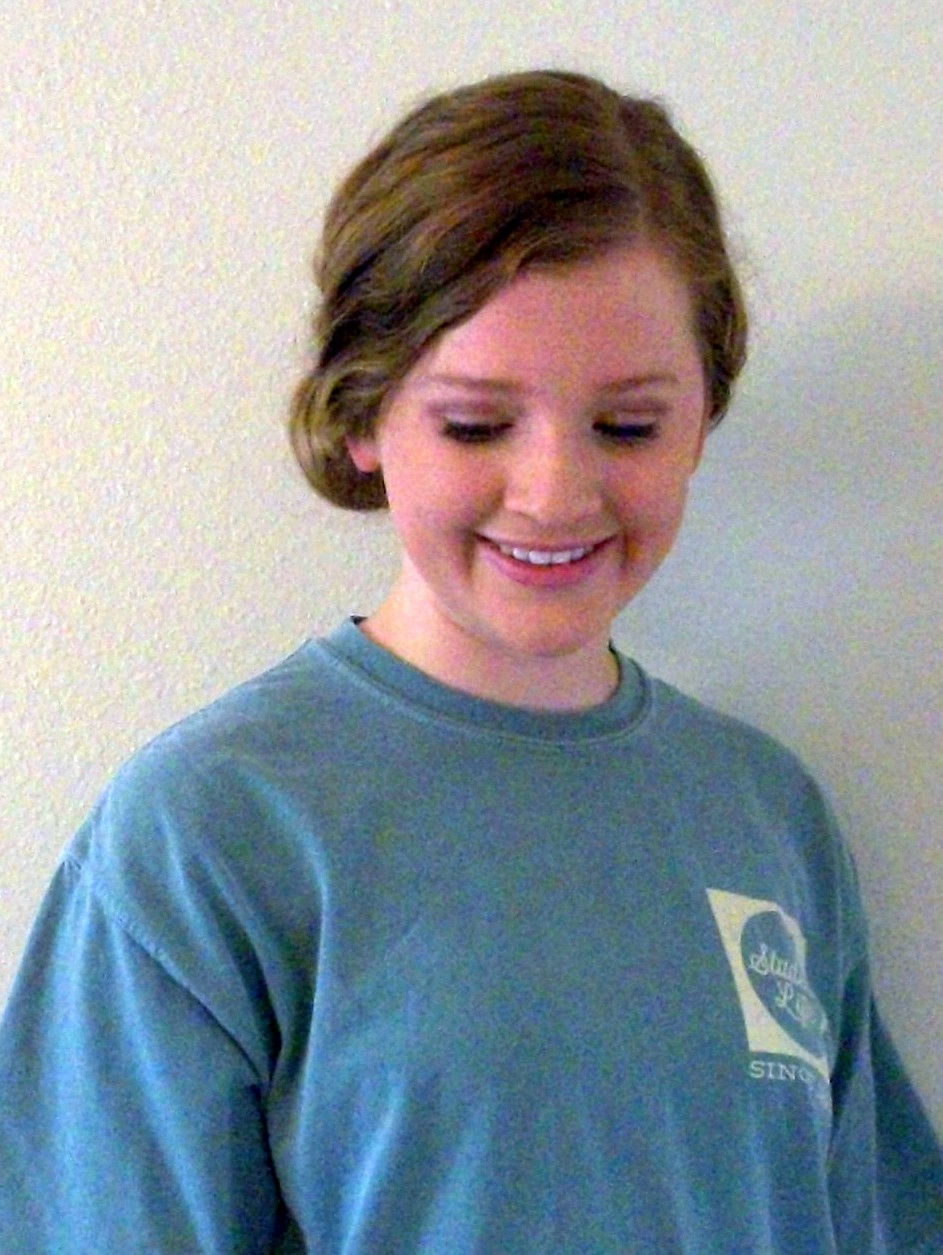
Here's the finished look. You can put decorative bobby pins in or clips to make the bun really stand out or to dress it up.
Here's the finished look. It is so cute, chic and easy to do!
I think the look turns out wonderful and is something everyone should at least try out. Hope you enjoy this look. It's a great 5 minute look!

                                                        photo Sig_zps6fb098ce.jpg      

Monday, October 7, 2013

Ponytail Unicorn Braided Bun

I am all about cute creative buns and this is one of those hairstyles. I've never seen any one wearing a bun like this and they are so easy to make and the style to me looks like it takes a lot of time and effort to get it but in reality it only take 2 minutes!

I believe that every braid, or twist can be made into a cute bun and I love trying out cute hairstyles. Usually I stand in front of my mirror, and just mess with my hair and figure out what hairstyles I can come up with and this is one that I thought was super cute.

Here's how you make it.

Materials Needed
  1. Hairbrush
  2. Hair ties
  3. Bobby Pin/ hair clips
  4. Hair spray
This look can be done on any hair type, especially curly hair.
1. Braid your hair into a unicorn braid. You can find my hair tutorial here
2. Next just grab your braid and wrap it around itself until it resembles the messy bun you want. I like to wear my buns big, so I usually wrap the braid really loose around itself and then pin it in place with bobby pins.
3. And there you have a cute new messy bun!

I hope you give this look a try. It is so cute and perfect for fall!

 photo Sig_zps6fb098ce.jpg

Monday, September 30, 2013

How to Unicorn Braid

I've seen a ton of cute braids lately, but one that I really like is the unicorn braid. It's really different from other braids and looks so cute. Here's how you do a unicorn braid.

1. Place your hair on one side of your face and part it down the middle.
2. Then twist the strands and just act like your doing a braid and just keep placing one section of hair behind the other. Basically your just twisting a section of hair behind the other section of hair and so on.
3. Then when you reach the end use a hair tie and some hair spray and your finished!

I hope you give this look a try! It is perfect for a day when you just what to leaver your hair alone but don't want to leave it down.

 photo Sig_zps6fb098ce.jpg

Monday, September 9, 2013

How to do a Messy Braid

 I know tons of people know how to braid but I for those of you who may need a tip or two or just a visual help in perfecting your braiding, this is for you.

Materials Needed:
  • Hair Tie
  • Hair Brush
  • A Headband (optional)
  • Hair spray (optional)
 
1. Start of with straight, curly or wavy hair. I prefer doing my braids when my hair is curly. I just think it looks super cute and messier than the regular straight braids that girls sport.
 2. Bring your hair to the side and split it into three equal pieces.
 3. Next  you have the option of how you want your braid to look. For those who want the braid tight to your face use this method.

Method 1: For a Tighter Braid You can take the piece closest to your face and bring it in front of your middle section of hair and place it there. Then bring the section of hair farthest from your hair over the middle section. Then just proceed doing the same thing over and over until you reach the tip of your hair and secure it with a hair tie.
 Method 2: For a Looser Fuller Braid. You can take the piece farthest to your face and bring it across in front of your middle section of hair and place it there, making it now the middle section of the braid. Then bring the section of hair closest to your hair over the middle section, making it the middle section of the braid. Then just proceed doing the same thing over and over until you reach the tip of your hair and secure it with a hair tie.
 4. After you've secured your braid with a hair tie,
Method 1: For a Messy Look. Now use your fingers to loosen up your braid. Just pull slightly on each row of the braid to give it a fuller look. This gives the braid a messier appearance. You can also add a cute headband to complete the messy braid look.
Method 2: For a Sleek Look. If you want a sleeker looking braid, just leave the braid tight and pull the hair tie tight to secure the look. Also you can use hairspray to tame any fly a ways.
 And tada, your finished! You know have a gorgeous messy braid. p.s. you can pull out a couple of strand around your face to make it an even messier braid. My hair is too long for that, but those of you with layers can get away with that cute look.
I hope you enjoyed this tutorial. I love braids and this is my go to hair style when my hair is in the way. It's also a way to get cute loose curls if you sleep on it over night. You can do so many other cute looks through just a braid, so I'll be showing you some more cute looks with braids over the next couple weeks.
 photo Sig_zps6fb098ce.jpg

Monday, September 2, 2013

Peanut Butter Oatmeal Cookie Dough Balls

Happy Labor Day! Here's a great recipe to start off your school year! The recipe is simple, easy and tastes so good! I hope you enjoy it and have a great Labor Day!!
My family has really enjoyed trying out different kinds of dessert this summer, and this by far is one my favorites! I'm sure you'll enjoy it as much I did!

Ingredients:

  1. 3/4 Cup whole wheat pastry flour
  2. 1 Cup rolled oats
  3. 1/2 Cup salted natural creamy peanut butter
  4. 1/3 Cup maple syrup
  5. 1/4 Cup unsweetened applesauce
  6. 1 Teaspoon vanilla extract
  7. 1/4 Cup mini semi-sweet chocolate chips (We used cocoa powder and made a chocolate sauce)
Directions:
  1. Grab a tray and line it with wax paper
  2. Mix all the dry ingredients together in a medium size bowl
  3. Whisk the wet ingredients with a hand mixer or electric mixer and add dry ingredients.
  4. Make cocoa powder drizzle
  5. Scoop up the cookie dough into balls and place on a the lined tray and drizzle or dip them in the cocoa sauce and enjoy!
  6. Place the tray in the freezer for an hour to get the real cookie dough feel. (optional)
Yields: 16 servings (I would double the recipe)
Takes 15 minutes
I could barely get a picture before my sister started eating the cookie dough balls. They were/are super good!
 Hope you give this recipe a try! It's one of my families new favorite desserts/ snacks!


 photo Sig_zps6fb098ce.jpg

Wednesday, August 28, 2013

DIY Summer Exfoliator


via
Easy DIY Summer Exfoliator For Glowing Skin

Damage from the sun and chlorine from the pool can leave your skin peeling and dull. Your first thought may be to go to the store and buy a skin scrub or something similar. The problem with that is most of those skin scrubs contain chemicals that no one should ever put anywhere near their bodies. However there is a solution! The experts from Skana spa of the New York resort Turning Stone have sent us this recipe for a chemical free skin scrub that can be made in minutes with ingredients you probably have lying around your kitchen.
What You Need:
1/4 cup coffee grinds from coffee maker
½ cup coconut oil
½ cup aloe vera gel
Directions:
  1. Remove excess water from the coffee grounds. The grounds don't need to be completely dry to use them in the recipe.
  2. Melt coconut oil in the microwave. Stir every 10 seconds until melted.  Pour over coffee grounds.
  3. Stir in the aloe and let set on the counter or in the refrigerator for several minutes. Stir occasionally while it is setting so the coffee grounds do not settle to the bottom of the mixture.
  4. To use, rub the mixture on your body in the shower. Pay extra attention to your knees, feet and elbows because the thick skin here tends to get dry. Do not use on your face because the coffee granules are too harsh for sensitive skin. Use your fingertips to scrub in small circles all over your body. Scrub for several minutes and rinse with cool water. The coffee is also said to help reduce cellulite, so be sure to use on your thighs, buttocks and lower abdomen.
Fun Facts:

  1. This recipe is very easy to make, but it is also very effective. The coconut oil is a natural moisturizer full of fatty acids that your skin needs to stay healthy. Since it has such a high concentration of oils, it penetrates deep in to the skin to moisturize and help your skin look and feel healthy. Aloe vera gel has been said to help the skin heal burns and moisturize dry skin. 
  2. Although aloe vera gel can heal burns, do not use this scrub on sunburned skin. Use after the redness and irritation are gone to help get rid of dry, peeling skin. 
  3. This easy recipe just takes a few minutes to make, so you can make it whenever your skin needs a little help looking its best. Your entire body will feel fresh and soft after this scrub thanks to its natural ingredients, and there are no chemicals or artificial ingredients that can irritate your skin.
  Sources:
Aloe Vera- http://www.mayoclinic.com/health/aloe-vera/NS_patient-aloe/DSECTION=evidence
Coconut Oil - http://www.huffingtonpost.com/2012/06/27/coconut-oil-benefits_n_1625631.html

 photo Sig_zps6fb098ce.jpg

Monday, August 26, 2013

A Braided Fishtail Bun


 What you will need:
  1. 1 hair tie
  2. 4-8 bobby pins
  3. Hair spray (optional)
  4. Flower hair pin (optional)
 1. Start off with already fishtailed hair. You can find my tutorial on how to fishtail here.
 2. Grab your side fishtail braid and wrap it around itself on the side of your head like you would do a ballerina bun.
 2. Use your bobby pins and secure it and secure it with hair spray.

And there you have a cute fishtail braided bun, perfect for any occasion.
 You can also add a cute bow or flower pin to complete the look.
I hope you give this look a try! I would love to hear how you liked the tutorial!

 photo Sig_zps6fb098ce.jpg
Related Posts Plugin for WordPress, Blogger...
//